Author name: Muhammad Zohaib

Download YouTube Playlist
Blog

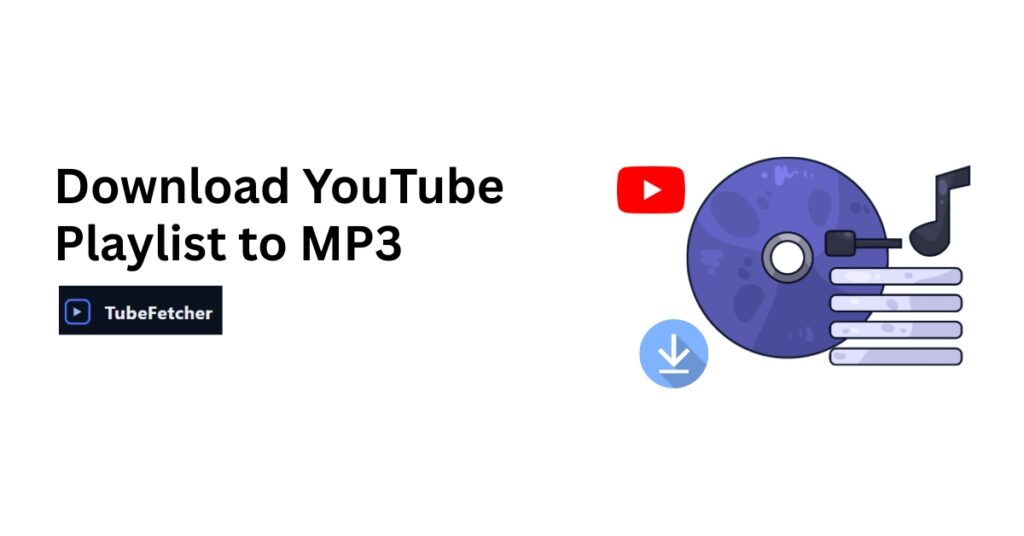
How to Download a YouTube Playlist to MP3 (2026 Guide)

You built a 150-song playlist on YouTube. Now you want those tracks as MP3 files for offline listening, in the car, at the gym, on a plane. Downloading each video individually and converting it to audio would take hours. The fastest approach: use desktop software that accepts playlist URLs and extracts audio in batches. Copy the playlist link, paste it into your downloader, select MP3 format with your preferred bitrate (192-320 kbps for music), and let it process the entire list. Most 100-song playlists complete in 15-30 minutes, depending on your connection. This guide covers multiple methods, explains audio quality settings, and helps you plan storage for your MP3 library. Why Convert YouTube Playlists to MP3 Video files consume 5-10 times more storage than audio-only files. A 4-minute music video at 720p uses roughly 80-120 MB. The same track as a 320 kbps MP3 uses only 10 MB. For a 100-song playlist, that difference means 8-12 GB versus 1 GB. MP3 files also play everywhere: car stereos, MP3 players, fitness watches, older phones, and any device without reliable internet. Video playback drains battery faster and requires screen-on time you don’t need when listening to music or podcasts. Best use cases for playlist-to-MP3 conversion: For content where visuals matter, tutorials, music videos you want to watch, and gaming content, keep the video format. For audio-focused content, MP3 saves storage and simplifies playback. Audio Quality: Bitrate Options Explained YouTube stores audio in Opus or AAC codec, typically at 128-256 kbps depending on the video’s upload quality. When you convert to MP3, you choose an output bitrate that determines file size and audio fidelity. Bitrate Quality Level File Size (4-min song) Best For 128 kbps Acceptable ~4 MB Podcasts, speech, casual listening 192 kbps Good ~6 MB Most music, balanced quality/size 256 kbps Very Good ~8 MB Quality-focused listeners 320 kbps Maximum ~10 MB Archiving, high-fidelity systems The transcoding reality: Converting Opus/AAC to MP3 involves transcoding, decoding the original format, and re-encoding as MP3. This process cannot add quality that wasn’t in the source. Selecting 320 kbps preserves what’s there but doesn’t enhance a 128 kbps source stream. Practical recommendation: 192 kbps provides excellent quality for most listeners at reasonable file sizes. Choose 320 kbps if you’re building a permanent archive or playing through high-quality speakers. Choose 128 kbps for spoken content where voice clarity matters more than musical fidelity. For more details on audio extraction, our guide on downloading YouTube audio as MP3 covers single-video workflows. Method 1: Desktop Software (Recommended for Most Users) Desktop applications handle playlist downloads most reliably. They manage the queue, retry failed downloads, preserve playlist order, and work without browser tabs staying open. Using TubeFetcher for Individual Tracks TubeFetcher excels at downloading individual videos with MP3 extraction. For playlists, you can work through tracks efficiently: This manual approach works well for smaller playlists (10-20 tracks) or when you want selective downloads rather than the entire list. Download TubeFetcher for Windows or Android to get started. Using Dedicated Playlist Software For large playlists (50+ tracks), dedicated playlist downloaders automate the entire process: 4K Video Downloader handles full playlist URLs: MediaHuman YouTube to MP3 Converter offers similar functionality with a simpler interface focused specifically on audio extraction. Both applications preserve playlist order in filenames, making organization straightforward. Method 2: Command Line with yt-dlp (Advanced Users) yt-dlp is an open-source command-line tool that handles playlist downloads with extensive customization. It requires comfort with terminal commands but offers the fastest downloads and most control. Basic Playlist-to-MP3 Command yt-dlp –extract-audio –audio-format mp3 –audio-quality 192K -o “%(playlist_index)02d – %(title)s.%(ext)s” “PLAYLIST_URL” What each part does: Preserving Metadata Add these flags to embed title, artist, and other information: yt-dlp –extract-audio –audio-format mp3 –audio-quality 192K –add-metadata –embed-thumbnail -o “%(playlist_index)02d – %(title)s.%(ext)s” “PLAYLIST_URL” The –add-metadata flag writes ID3 tags. The –embed-thumbnail flag adds the video thumbnail as album art. Handling Large Playlists For playlists with 100+ tracks, add reliability options: yt-dlp –extract-audio –audio-format mp3 –audio-quality 192K –retries 10 –fragment-retries 10 –download-archive downloaded.txt -o “%(playlist_index)02d – %(title)s.%(ext)s” “PLAYLIST_URL” The –download-archive downloaded.txt flag tracks completed downloads, allowing you to restart without re-downloading finished tracks. Note: yt-dlp requires FFmpeg installed on your system for audio conversion. Both are free and open-source. Method 3: Online Converters (No Installation) Browser-based converters work without installing software. Paste your playlist URL, select MP3, and download the converted files. How Online Converters Work Limitations and Risks Playlist size caps: Most online tools limit playlists to 20-50 videos. Larger playlists require splitting or multiple sessions. Speed: Server-side conversion takes longer than local processing. A 50-song playlist might take 30-60 minutes versus 10-15 minutes with desktop software. Advertising: Free online converters display aggressive ads. Some include deceptive download buttons that install unwanted software. Privacy: Your playlist data passes through third-party servers. For personal playlists or private content, this creates unnecessary exposure. Reliability: Online services frequently change domains, go offline, or degrade in quality. Desktop software provides consistent long-term functionality. For occasional use with small playlists, online converters work adequately. For regular playlist downloading, desktop software offers better speed, safety, and reliability. Our guide on safe YouTube downloaders covers security considerations in detail. Method 4: Mobile Downloads (Android and iOS) Mobile playlist downloading faces more restrictions than desktop methods. Android Options Android allows sideloading apps outside the Play Store. Apps like Seal (available on F-Droid) handle playlist URLs and MP3 extraction. Download the APK, grant storage permissions, and paste your playlist link. TubeFetcher for Android handles individual video downloads with MP3 extraction: iOS Limitations Apple restricts apps that download from YouTube. Browser-based tools work but face the same limitations as desktop online converters. The most reliable iOS workflow: download on a computer, then transfer MP3 files via iTunes, AirDrop, or cloud storage. Why Mobile Falls Short for Large Playlists Phone storage fills quickly with 100+ MP3 files. Battery drain during long download sessions is significant. Mobile connections may be slower or metered. For serious playlist conversion, desktop remains the practical choice. Storage Planning for MP3 Playlists Calculate

YouTube Downloader Blocked by Antivirus? Safe Solutions (2026)
Blog

YouTube Downloader Blocked by Antivirus: Safe Solutions (2026 Guide)

You download TubeFetcher, double-click the installer, and your antivirus throws a warning: “Potentially Unwanted Program Detected” or “Threat Blocked.” Your first instinct is to delete the file and assume the worst. Here is what actually happened: your antivirus flagged a false positive. Legitimate YouTube downloaders trigger security warnings because of how they operate, not because they contain malware. The safe response is to verify the source, then whitelist the program. Never disable your antivirus entirely. This guide explains why these blocks happen, how to verify TubeFetcher is safe, and step-by-step instructions for whitelisting in Windows Defender, Avast, Norton, McAfee, Kaspersky, and Bitdefender. Why Antivirus Software Blocks YouTube Downloaders Understanding the “why” helps you make informed decisions about which warnings to trust and which to override. Heuristic Detection Triggers False Positives Modern antivirus programs use heuristic analysis, they watch for suspicious behavior patterns rather than just matching known malware signatures. YouTube downloaders exhibit several behaviors that trigger heuristic flags: Network activity patterns. Downloaders make repeated connections to video servers, download large files, and parse webpage data. These patterns resemble how some malware communicates with command servers. File system modifications. Saving videos to your drive, creating folders, and writing metadata files looks similar to how trojans drop payloads. Unsigned or newly signed code. Small software publishers often lack expensive Extended Validation certificates. Without recognized signatures, antivirus tools treat executables with suspicion. The “Potentially Unwanted Program” Label PUP warnings differ from malware alerts. A PUP designation means the antivirus considers the software potentially problematic, not that it detected actual malicious code. Many free downloaders bundle adware, toolbars, or browser hijackers. Antivirus vendors trained their detection models on these bundled installers. Now, even clean downloaders like TubeFetcher trigger the same heuristic patterns. The distinction matters: PUP warnings ask you to decide whether you want the software. Malware alerts indicate confirmed threats. TubeFetcher triggers PUP warnings because of its category, not its code. Low Reputation Scores for New Software Windows SmartScreen and browser download protection use reputation systems. Software earns trust through widespread installation and time without incident reports. New or niche applications start with low reputation scores regardless of actual safety. TubeFetcher has 100,000+ downloads, but that number is small compared to mainstream software with millions of installations. The reputation gap causes initial warnings that decrease as more users install and verify the software. How to Verify TubeFetcher Is Safe Before Whitelisting Never whitelist software blindly. Verify safety first, then add exceptions. Download Only From the Official Source The single most important safety step: download TubeFetcher exclusively from tubefetcher.com. Third-party download sites often repackage legitimate software with bundled malware. Official download links: If you downloaded from anywhere else, delete that file and get the official version. Check VirusTotal Results VirusTotal scans files against 70+ antivirus engines simultaneously. Upload the TubeFetcher installer to virustotal.com before running it. What to expect: a few detections (1-5 out of 70+) labeled as “PUP,” “Generic,” or “Heuristic” are normal for downloaders. These indicate pattern-matching, not confirmed malware. Red flags on VirusTotal: detections labeled “Trojan,” “Backdoor,” “Ransomware,” or high detection counts (20+) from major vendors indicate genuine threats. Review Privacy and Legal Documentation Legitimate software publishers provide transparent policies. TubeFetcher publishes: Sketchy downloaders either lack these documents or bury concerning permissions in dense legal text. Consider the Portable Version The portable ZIP version (TubeFetcher-win-Portable.zip) sometimes triggers fewer warnings than the .exe installer. Portable apps run without installation, which reduces the behavior patterns that trigger heuristic detection. Step-by-Step Whitelist Instructions by Antivirus Once you verify TubeFetcher’s safety, add it to your antivirus exceptions. These instructions cover the most common security software. Windows Defender (Windows Security) Windows Defender protects most Windows 10 and 11 systems by default. If the file was quarantined: To add an exclusion preventing future blocks: For download blocks: If Windows blocked the download itself, go to Protection history, find the blocked item, and select “Allow on device.” Avast and AVG Avast and AVG use the same engine with different interfaces. To restore from quarantine: To add an exclusion manually: Norton To restore quarantined items: To add an exclusion: McAfee To restore quarantined files: To add an exclusion: Kaspersky To restore and trust: To add exclusion: Bitdefender To restore quarantined items: To add an exclusion: Browser Download Blocks Chrome, Edge, and Firefox use separate reputation systems from your antivirus. You may need to allow downloads in both layers. Chrome/Edge “Dangerous file” warning: If “Keep” does not appear: These browser warnings reflect reputation scores, not malware detection. Once your antivirus confirms the file is safe, browser warnings become redundant. What NOT to Do Avoid these common mistakes when handling antivirus blocks: Never disable antivirus entirely: Turning off real-time protection to install one program leaves your system vulnerable to everything else. Use targeted exclusions instead. Never download from unofficial sources: If one download site’s version gets blocked but another’s doesn’t, the unblocked version may be repackaged with actual malware. Stick to tubefetcher.com. Never ignore warnings for software you didn’t intentionally download: If antivirus blocks something you don’t recognize, that’s protection working correctly. Only whitelist software you actively chose to install. Never share whitelisted files: If you add an exclusion and later forward that file to someone else, their antivirus might catch something yours now ignores. Red Flags: When Warnings Indicate Real Threats Not all blocked downloaders deserve whitelisting. Watch for these signs of actually dangerous software: Bundled installers: If installation offers toolbars, browser extensions, or “recommended” software, the downloader is monetizing through bundleware, often adware or worse. Requests for unnecessary permissions: A video downloader needs network and file system access. It does not need webcam access, admin privileges for basic operation, or permission to modify system settings. No clear publisher information: Legitimate software identifies its creator. Anonymous or vague publisher details suggest something to hide. Download from random sites: URLs like “youtube-downloader-free-2026-crack.xyz” are malware distribution points regardless of what they claim to offer. High VirusTotal detection with specific threat names: Generic “PUP” flags differ from “Trojan.GenericKD” or “Backdoor.Agent” detections. Specific

720p vs 1080p Downloads
Blog

720p vs 1080p Downloads: Storage vs Quality Trade-off (2026 Guide)

You are about to download a YouTube video, and TubeFetcher shows you both 720p and 1080p options. The 1080p file is twice the size. Is the quality difference worth filling your drive faster? 1080p delivers 2.25 times more pixels than 720p and looks noticeably sharper on screens larger than 32 inches. But 1080p files typically consume 60-100% more storage than their 720p counterparts. For phones and tablets under 10 inches, 720p provides excellent quality at half the storage cost. For laptops, monitors, and TVs, 1080p justifies the extra space. This guide breaks down the actual numbers, shows you when each resolution makes sense, and helps you make the right choice for your specific situation. The Technical Reality: What 720p and 1080p Actually Mean Resolution numbers represent pixel dimensions, the tiny dots that form your video image. 720p (HD): 1280 pixels wide by 720 pixels tall = 921,600 total pixels 1080p (Full HD): 1920 pixels wide by 1080 pixels tall = 2,073,600 total pixels The math is straightforward: 1080p contains 2.25 times more pixels than 720p. More pixels mean finer detail, sharper edges, and clearer text. But more pixels also mean larger file sizes. Why Pixel Count Alone Does Not Tell the Whole Story Two factors determine whether you actually see the quality difference: Screen size matters. On a 5.5-inch phone screen, your eyes cannot distinguish individual pixels at either resolution from normal viewing distance. The extra 1.1 million pixels in 1080p go unnoticed. On a 50-inch TV, those pixels spread across a much larger area, making the difference obvious. Viewing distance matters. Sitting 10 feet from a TV versus 2 feet from a laptop changes everything. The closer you sit, the more resolution matters. The practical threshold: screens under 10 inches at arm’s length show minimal visible difference between 720p and 1080p. Screens over 24 inches at normal viewing distances reveal 1080p’s advantage clearly. Storage Comparison: The Real Numbers File size depends on three factors: resolution, video length, and encoding bitrate. Here are typical ranges for YouTube downloads: File Size by Video Length Video Length 720p (Typical) 1080p (Typical) Difference 3 minutes 20-35 MB 45-80 MB ~2x larger 10 minutes 70-120 MB 150-280 MB ~2x larger 30 minutes 200-350 MB 450-800 MB ~2x larger 1 hour 400-700 MB 900-1,500 MB ~2x larger 2 hours 800-1,400 MB 1.8-3.0 GB ~2x larger These ranges reflect typical YouTube encoding. Highly detailed content (nature documentaries, gaming footage) tends toward the higher end. Talking-head videos and podcasts fall toward the lower end. Library Storage Planning If you are building an offline video library, storage adds up quickly: Library Size 720p Storage 1080p Storage 50 videos (avg 20 min) ~6-10 GB ~12-22 GB 100 videos (avg 20 min) ~12-20 GB ~25-45 GB 200 videos (avg 20 min) ~25-40 GB ~50-90 GB 500 videos (avg 20 min) ~60-100 GB ~125-220 GB A 128GB phone with 80GB usable storage holds roughly 400-600 videos at 720p or 180-300 videos at 1080p. That difference matters when you are preparing for a long flight or an offline study session. When 720p Makes More Sense Choose 720p when storage efficiency outweighs marginal quality gains: Mobile Devices Under 7 Inches Phone screens pack pixels tightly. A 6.5-inch phone with a 1080p display has roughly 400 pixels per inch. At that density, 720p content upscales cleanly without visible artifacts. You save 50% storage and notice no practical difference during playback. Tablets for Casual Viewing Watching downloaded videos on a 10-inch tablet while commuting or traveling? 720p delivers perfectly acceptable quality. Save your storage for more content rather than pixels you will not perceive. Limited Storage Situations 64GB phones, older laptops with small SSDs, or SD cards with limited space, 720p lets you carry more content. Twenty tutorials at 720p beat ten tutorials at 1080p when you need reference material offline. Slow or Metered Internet Downloading over hotel WiFi, mobile data, or slow connections? 720p downloads in half the time. When bandwidth is precious, smaller files mean faster access to your content. Content Where Visuals Are Secondary Podcasts, lectures, audiobooks with static images, talking-head videos, and educational content where you are listening more than watching, 720p handles these perfectly. The speaker’s face does not need 2 million pixels to convey information. For downloading educational content efficiently, our guide on saving lecture videos offline covers optimal settings for study materials. When 1080p Justifies the Space Choose 1080p when visual quality genuinely improves your viewing experience: Large Screens (32 Inches and Above) TVs, desktop monitors, and large displays reveal the pixel difference clearly. Watching a downloaded documentary on your 55-inch TV? 720p looks soft and slightly blurry. 1080p maintains sharpness at that scale. Close Viewing Distances Laptop users sitting 18-24 inches from a 15-inch screen see the difference. Desktop users at arm’s length from a 27-inch monitor see it even more. The closer you sit, the more resolution matters. Visually Detailed Content Nature documentaries, music videos, cinematography-focused content, gaming footage, animation, and anything where visual detail is the point, these benefit from 1080p. Fine textures, distant details, and fast motion all render better at higher resolution. Archive-Quality Downloads Planning to keep videos long-term? Storage costs drop yearly, while re-downloading becomes impossible when videos get removed. For permanent archives, 1080p provides future-proof quality. Text-Heavy Content Tutorials showing code, spreadsheets, small UI elements, or text that needs to be readable, 1080p keeps text crisp. 720p can blur small characters, making programming tutorials or software walkthroughs harder to follow. Our guide on downloading tutorials and courses offline covers resolution choices for educational content in detail. The Hidden Factor: Bitrate Matters More Than You Think Here is something most resolution comparisons miss: a well-encoded 720p video can look better than a poorly-encoded 1080p video. Bitrate measures how much data the video uses per second of playback (measured in Mbps, megabits per second). Higher bitrate means more data to represent each frame, which means better quality. Typical YouTube bitrates: When YouTube compresses a visually complex video heavily to save bandwidth, that

Downloaded YouTube Video
Blog

How to Organize Your Downloaded YouTube Video Library (Complete System)

You downloaded 200 YouTube videos over six months. Now they sit in your Downloads folder with names like videoplayback.mp4, tutorial (3).mp4, and Y2meta-1080p-final.mp4. Finding that one cooking tutorial from three weeks ago? Good luck. This guide gives you a complete organization system, folder structures you can copy, naming conventions that actually work, and tools that turn chaos into a searchable library. Whether you have 50 videos or 5,000, this framework scales. Why Most Downloaded Video Libraries Fail The typical approach looks like this: download video, leave default filename, dump into Downloads folder, repeat. Within weeks, you have hundreds of files with no logical structure. Three problems kill video library usability: Inconsistent naming makes search impossible. When files are named video.mp4, Khan Academy – Algebra Basics.mp4, and 2024-03-15_cooking.mp4 in the same folder, no naming logic exists for your brain or your computer to follow. Flat folder structures create scrolling nightmares. One folder with 300 files forces you to scan every filename manually. Missing metadata means lost context. Six months later, you cannot remember which channel made that video or why you downloaded it. The solution requires three components working together: hierarchical folders, standardized naming, and preserved metadata. Choose Your Organization Model First Before creating folders, decide on your primary sorting logic. Two models dominate, and your choice depends on how you consume content. Channel-First Model Organize by creator, then by date or topic within each channel folder. YouTube_Library/ ├── Khan Academy/ │   ├── 2025/ │   └── 2026/ ├── Veritasium/ ├── Kurzgesagt/ └── Gordon Ramsay/ Best for: Educational content, series-based watching, and following specific creators consistently. Topic-First Model Organize by subject matter, with channels as subfolders or mixed within topics. YouTube_Library/ ├── Cooking/ │   ├── Italian/ │   └── Baking/ ├── Programming/ │   ├── Python/ │   └── JavaScript/ ├── Fitness/ └── Music/ Best for: Research projects, skill-building libraries, and content from many creators on similar topics. Hybrid Model (Recommended) Combine both approaches, categories at the top level, channels within categories. YouTube_Library/ ├── Education/ │   ├── Khan Academy/ │   └── 3Blue1Brown/ ├── Tutorials/ │   ├── Cooking/ │   └── DIY/ ├── Entertainment/ │   └── Music Videos/ └── _Unsorted/ The _Unsorted folder (underscore pushes it to the top alphabetically) holds new downloads before you categorize them. Process this folder weekly. The Complete Folder Structure Template Copy this structure and adapt category names to your content types: D:\YouTube_Library\ │ ├── Education/ │   ├── Khan Academy/ │   │   ├── 2025/ │   │   └── 2026/ │   ├── Crash Course/ │   └── MIT OpenCourseWare/ │ ├── Tutorials/ │   ├── Cooking/ │   ├── Programming/ │   ├── Photography/ │   └── Language Learning/ │ ├── Entertainment/ │   ├── Music Videos/ │   ├── Documentaries/ │   └── Comedy/ │ ├── Fitness/ │   ├── Yoga/ │   ├── HIIT/ │   └── Strength Training/ │ ├── _Unsorted/ │ ├── _Archive/ │   └── Watched-2025/ │ └── _Playlists/     ├── Study Session.m3u     └── Workout Mix.m3u Structure rules: File Naming Convention That Works Consistent naming transforms search from frustrating to instant. This formula balances human readability with machine sorting: YYYY-MM-DD – Channel Name – Video Title [VideoID].mp4 Example: 2026-01-15 – Khan Academy – Introduction to Linear Algebra [dQw4w9WgXcQ].mp4 Why Each Element Matters Date prefix (YYYY-MM-DD): Files sort chronologically by name. The ISO 8601 format ensures proper ordering (2026-01-15 sorts before 2026-02-01). Channel name: Identifies the creator without opening the file. Critical when browsing topic-based folders containing multiple channels. Video title: Human-readable description of content. Video ID in brackets: The 11-character YouTube identifier prevents duplicate confusion. Two videos titled “Introduction to Python” from different channels stay distinct. Naming Variations by Use Case For music videos: Artist – Song Title [VideoID].mp4 2026-01-20 – Taylor Swift – Anti-Hero [abc123xyz].mp4 For course content: Course Name – Module ## – Lesson Title [VideoID].mp4 Python Masterclass – Module 03 – Functions and Arguments [xyz789abc].mp4 For lecture series: Professor-Institution – Course – Lecture ## [VideoID].mp4 MIT 18.01 – Single Variable Calculus – Lecture 05 [def456ghi].mp4 Characters to Avoid in Filenames Remove or replace these characters that cause cross-platform issues: Character Replace With / \ – : – * ? (remove) ” < > (remove) ` ` TubeFetcher handles most problematic characters automatically during download, but manual renames should follow these rules. Set Your Download Location in TubeFetcher Skip the “organize later” trap by downloading directly to the correct folder. In TubeFetcher for Windows: This workflow means every download lands in a logical location from the start. Process your _Unsorted folder weekly, rename files using the convention above and move them to permanent locations. For batch downloading multiple videos, check our guide on batch downloading YouTube videos to streamline the process. Tools That Surface Your Library Once organized, these tools transform static folders into browsable, searchable libraries. Jellyfin (Free, Open Source) Jellyfin treats your video folders like a personal Netflix. Point it at your YouTube_Library folder, and it creates a browsable interface with thumbnails, search, and playback across devices. Setup for YouTube libraries: Plex (Free Tier Available) Similar to Jellyfin with a more polished interface. The free tier handles local playback; premium adds remote streaming. Configuration tip: Use the “Other Videos” library type for downloaded YouTube content. Standard movie/TV libraries expect specific naming that does not match YouTube content. VLC Media Player For simpler needs, VLC’s playlist feature organizes videos without server setup. Everything Search (Windows) This free utility indexes your entire drive and finds files instantly by partial name match. Search “Khan Algebra” and every matching file appears in milliseconds, far faster than Windows default search. Maintenance: Keep Your Library Clean Organization degrades without maintenance. Schedule these tasks: Weekly (15 minutes) Monthly (30 minutes) Quarterly (1 hour) Finding and Removing Duplicates Duplicate videos waste storage and create confusion. Two approaches: Manual method: Sort folders by file size. Duplicates often have identical sizes. Compare filenames and delete extras. Tool-assisted: Applications like dupeGuru (free, cross-platform) scan folders and identify duplicate files

Download YouTube Videos
Blog

How to Download YouTube Videos to an External Hard Drive (Step-by-Step)

To download YouTube videos directly to an external hard drive, connect your drive, open TubeFetcher, set your download destination to the external drive’s folder, paste the YouTube URL, and click download. The video saves directly to your external storage without intermediate steps or manual file transfers. This approach keeps your computer’s internal storage free while building a portable video library you can access anywhere. Whether you’re archiving educational content, saving entertainment for travel, or creating offline backups of important videos, downloading directly to external storage streamlines the entire process. Why Save YouTube Videos to an External Hard Drive? External drives solve several problems that internal storage creates: Free Up Internal Space: A single hour of 1080p video consumes 1-2 GB. Regular downloaders quickly fill laptop SSDs, especially on devices with 256 GB or less. External drives offload this burden entirely. Portability: Carry your video library between computers, to friends’ houses, or on trips. Plug the drive into any compatible device and watch without internet. Backup Security: Videos disappear from YouTube regularly. Channels get deleted, copyright claims remove content, creators privatize uploads. An external drive preserves your curated collection permanently. Organization: Dedicated video storage lets you build structured libraries by topic, channel, or purpose without cluttering your main file system. Choosing the Right External Drive Not all external drives work equally well for video storage. Consider these factors: Storage Type: HDD vs SSD Attribute HDD (Hard Disk Drive) SSD (Solid State Drive) Price per TB $20-40 $60-100 Speed 100-150 MB/s 400-1000+ MB/s Durability Fragile (moving parts) Rugged (no moving parts) Best For Large archives, stationary use Travel, frequent transfers For pure video storage where you’ll mostly write files and occasionally read them, HDDs offer excellent value. A 4TB external HDD costs around $80-100 and holds approximately 2,000 hours of 1080p content. SSDs make sense if you travel frequently or need faster access for editing. Their shock resistance protects data when tossed in bags or dropped. Capacity Planning Estimate your storage needs based on video resolution: Resolution File Size (10 min) Videos per 1TB Videos per 4TB 480p 50-80 MB ~15,000 ~60,000 720p 100-150 MB ~8,000 ~32,000 1080p 200-350 MB ~3,500 ~14,000 4K 500-800 MB ~1,500 ~6,000 Most users downloading primarily 1080p content find 1-2 TB sufficient for years of collecting. Heavy archivists or 4K enthusiasts should consider 4TB or larger. Connection Type USB 3.0/3.1: Standard on most drives. Provides 100-600 MB/s transfer speeds. Compatible with virtually all computers. USB-C: Newer connection standard. Same speeds as USB 3.1 but reversible connector. Requires USB-C port or adapter. Thunderbolt: Fastest option (up to 2800 MB/s) but limited to Macs and some Windows laptops. Overkill for video storage unless you’re also editing. For downloading YouTube videos, USB 3.0 handles everything comfortably. Download speeds from YouTube rarely exceed 20-50 MB/s regardless of your drive’s capability. Formatting Your External Drive Before downloading, ensure your drive uses the right file system for your needs: File System Comparison File System Windows macOS Max File Size Best For exFAT Yes Yes 16 EB (unlimited practical) Cross-platform use NTFS Yes Read-only 16 EB Windows-only users APFS No Yes 8 EB Mac-only users FAT32 Yes Yes 4 GB Avoid for video Recommendation: Format your drive as exFAT if you use both Windows and Mac computers. This ensures full read/write compatibility across platforms while supporting large video files. Avoid FAT32 for video storage. Its 4GB maximum file size means longer 4K videos won’t fit in a single file. How to Format (Windows) How to Format (macOS) Downloading Directly to Your External Drive with TubeFetcher TubeFetcher lets you save YouTube videos straight to any connected drive, eliminating the download-then-transfer workflow that wastes time and creates duplicate files. Step 1: Connect Your External Drive Plug your drive into an available USB port. Wait for your computer to recognize it: Step 2: Open TubeFetcher and Set Download Location Launch TubeFetcher on your computer. Before downloading, configure the output destination: TubeFetcher remembers this setting for future downloads until you change it. Step 3: Copy the YouTube Video URL Navigate to the YouTube video you want to download. Copy the URL from your browser’s address bar. The link format looks like: Step 4: Paste and Download Return to TubeFetcher, paste the URL into the input field. Select your preferred quality (720p, 1080p, etc.) and format (MP4 recommended for compatibility). Click download. The video saves directly to your external drive. No intermediate storage on your computer, no manual file moving required. Step 5: Verify the Download Open your external drive in File Explorer or Finder. Navigate to your designated folder. The downloaded video should appear with the video title as the filename. For detailed TubeFetcher instructions, see our complete guide on how to use TubeFetcher. Bonus: Run TubeFetcher FROM Your External Drive TubeFetcher’s portable Windows version requires no installation. You can run the application directly from your external drive: This approach creates a completely self-contained system. Plug your drive into any Windows computer, run TubeFetcher, and download videos, all without touching the host machine’s storage or installing software. Perfect for: Organizing Your Video Library A well-organized external drive saves hours of searching later. Establish a folder structure before downloading hundreds of videos. Recommended Folder Structure External Drive/ ├── YouTube_Archive/ │   ├── Educational/ │   │   ├── Programming/ │   │   ├── Science/ │   │   └── Languages/ │   ├── Entertainment/ │   │   ├── Music/ │   │   ├── Documentaries/ │   │   └── Movies/ │   ├── Tutorials/ │   │   ├── Software/ │   │   ├── DIY/ │   │   └── Cooking/ │   └── By_Channel/ │       ├── ChannelName1/ │       └── ChannelName2/ Adapt this structure to your actual content. The key principle: create categories that match how you’ll search for videos later. File Naming Conventions TubeFetcher uses the video’s YouTube title as the filename by default. For better organization, consider renaming files with a consistent pattern: [Category] Title –

YouTube Video Codecs
Blog

Understanding YouTube Video Codecs: H.264, VP9, and AV1 Explained

YouTube serves H.264, VP9, or AV1 video depending on three factors: the video’s resolution, its popularity, and your device’s decoding capabilities. H.264 provides universal compatibility for older devices. VP9 handles most 4K content with better compression. AV1 delivers the highest efficiency where hardware support exists. When you download YouTube videos with TubeFetcher, you receive H.264 encoded files in MP4 format. This ensures your downloads play on virtually any device without compatibility issues. Understanding these codecs helps explain why YouTube videos look different across devices and why some 4K streams work smoothly while others stutter. What Is a Video Codec? A codec (compressor-decompressor) is software that shrinks raw video into manageable file sizes and then expands it during playback. Without compression, a single minute of uncompressed 4K video would exceed 20 gigabytes. Codecs make streaming and storage practical. Container vs Codec These terms often cause confusion: Think of the container as a shipping box and the codec as the packing method inside. An MP4 container typically holds H.264 video. A WebM container typically holds VP9 or AV1 video. The codec determines quality and efficiency. The container determines compatibility with players and devices. For deeper format comparison, see our guide on MP4 vs WebM for YouTube downloads. H.264 (AVC): The Universal Standard H.264, also called Advanced Video Coding (AVC), launched in 2003 and became the foundation of internet video. Two decades later, it remains the most compatible codec in existence. Why H.264 Still Matters Every smartphone, tablet, laptop, Smart TV, gaming console, and car infotainment system manufactured in the last 15 years includes H.264 hardware decoding. This universal support means: H.264 hardware decoders are so common that manufacturers include them by default, even in budget devices. H.264 on YouTube YouTube generates H.264 versions of every uploaded video as a compatibility fallback. You’ll receive H.264 streams when: H.264 Limitations The codec shows its age at higher resolutions. To make 4K video look good in H.264, file sizes become impractical for streaming. A 4K H.264 stream might require 30-40 Mbps, while VP9 achieves similar quality at 15-20 Mbps. This efficiency gap explains why YouTube moved to newer codecs for high-resolution content. H.264 Attribute Value Release Year 2003 Typical YouTube Use Up to 1080p, fallback codec Compression Efficiency Baseline (reference point) Hardware Support Universal Licensing Royalty-bearing (patent pools) Battery Impact Very low (hardware decode everywhere) VP9: YouTube’s 4K Workhorse Google developed VP9 as a royalty-free alternative to H.265/HEVC. Released in 2013, VP9 became YouTube’s primary codec for high-resolution streaming and remains the dominant choice for 4K content. VP9 Efficiency Gains VP9 achieves roughly 30-50% better compression than H.264 at equivalent visual quality. This efficiency comes from: For YouTube, these gains translate directly to bandwidth savings. Serving billions of video views daily, even small efficiency improvements save enormous infrastructure costs. VP9 on YouTube VP9 serves as the workhorse for resolutions above 1080p: When you watch 4K content on YouTube through a modern browser, you’re almost certainly receiving VP9 streams. VP9 Device Support VP9 took years to achieve widespread hardware support. Apple devices notably lagged, iPhones couldn’t play VP9 hardware-accelerated until iOS 14 (2020), which explains why YouTube on older iPhones maxed out at 1080p even when 4K was available. Today, VP9 hardware decoding exists in: VP9 Attribute Value Release Year 2013 Developer Google Typical YouTube Use 1440p, 4K, popular videos Compression Efficiency 30-50% better than H.264 Hardware Support High (most modern devices) Licensing Royalty-free Battery Impact Low-Medium AV1: The Future of Video Compression AV1 (AOMedia Video 1) represents the cutting edge of video compression technology. Developed by the Alliance for Open Media, a consortium including Google, Amazon, Netflix, Apple, Microsoft, and others, AV1 launched in 2018 with a clear mission: deliver better compression than VP9 while remaining royalty-free. AV1 Efficiency AV1 achieves approximately 30% better compression than VP9, which translates to roughly 50% better than H.264. At the same file size, AV1 produces noticeably sharper video with fewer compression artifacts, particularly in: This efficiency makes AV1 ideal for bandwidth-constrained scenarios: mobile networks, developing regions with limited infrastructure, and extremely high resolutions like 8K. AV1 on YouTube YouTube uses AV1 selectively based on several factors: High-Resolution Content: 8K videos typically stream in AV1 where device support exists. Popular Videos: When a video gains significant viewership, YouTube prioritizes transcoding it to AV1. The bandwidth savings across millions of views justify the encoding cost. User Settings: YouTube allows users to enable “Always prefer AV1” in Playback and Performance settings, forcing AV1 delivery on capable devices. Device Capability: YouTube’s adaptive streaming detects your hardware’s AV1 decode support and serves accordingly. AV1 Hardware Reality AV1’s computational demands create a hardware divide: With Hardware Decode (Smooth Playback): Without Hardware Decode (Problems): If your device lacks AV1 hardware decoding, forcing AV1 playback creates a poor viewing experience. YouTube’s automatic codec selection exists precisely to avoid this situation. AV1 Attribute Value Release Year 2018 Developer Alliance for Open Media Typical YouTube Use 8K, viral videos, opt-in users Compression Efficiency ~30% better than VP9, ~50% better than H.264 Hardware Support Growing (post-2020 devices) Licensing Royalty-free Battery Impact High without hardware decode How YouTube Selects Your Codec YouTube doesn’t serve the same codec to everyone. Its adaptive streaming system evaluates multiple factors in real-time: Resolution Threshold YouTube Codec Selection by Resolution: ├── 144p – 720p │   └── H.264 or VP9 (device-dependent) ├── 1080p │   └── H.264 or VP9 (both commonly available) ├── 1440p (2K) │   └── VP9 primary, H.264 fallback ├── 2160p (4K) │   └── VP9 or AV1 (H.264 rare) └── 4320p (8K)     └── AV1 preferred, VP9 fallback Higher resolutions push toward newer, more efficient codecs because H.264’s file sizes become impractical. Popularity Queue Low-view videos often remain in H.264 only. YouTube’s transcoding resources prioritize popular content: This tiered approach saves YouTube processing costs while ensuring popular videos benefit from maximum compression efficiency. Device Negotiation Your browser communicates its codec capabilities to YouTube. The platform then serves the best codec your device can handle efficiently: This negotiation happens automatically. You don’t

MP4 vs WebM
Blog

MP4 vs WebM: Which Format Should You Choose for YouTube Downloads?

MP4 wins for universal device playback across iPhones, Smart TVs, and car systems. WebM wins for smaller file sizes and access to YouTube’s highest quality 4K streams. TubeFetcher downloads YouTube videos in MP4 format by default, ensuring your files play on virtually any device without conversion headaches. The format you choose depends entirely on where you plan to watch. Someone downloading lecture videos for an iPad needs MP4. Someone archiving 4K content on a PC with limited storage benefits from WebM. This guide breaks down the real differences so you can make the right choice for your specific situation. Understanding Containers vs Codecs Before comparing formats, you need to understand what you’re actually comparing. MP4 and WebM are containers; think of them as boxes that hold video and audio data. The codec inside the container determines actual quality and file size. Container: The file format wrapper (MP4, WebM, MKV)Codec: The compression method for video/audio data inside MP4 Container Breakdown MP4 typically contains: H.264 became the industry standard because every smartphone, tablet, Smart TV, gaming console, and car infotainment system includes hardware decoding for it. Your device’s processor handles H.264 playback efficiently without draining battery or generating heat. WebM Container Breakdown WebM typically contains: Google developed WebM as an open, royalty-free alternative to MP4. YouTube uses VP9 extensively for streams above 1080p because it delivers equivalent visual quality at 30-50% smaller file sizes compared to H.264. Quick Comparison: MP4 vs WebM Attribute MP4 (H.264/AAC) WebM (VP9/Opus) Device Compatibility Universal Browsers, Android, PC iPhone/iPad Support Native Limited (improving) Smart TV Support Excellent Varies by model File Size Larger 30-50% smaller Max Resolution on YouTube Often capped at 1080p 4K, 8K, HDR available Hardware Decoding Ubiquitous Growing support Editing Software Support All major NLEs Limited Open Source No (licensed) Yes (royalty-free) When to Choose MP4 MP4 remains the safest choice for most people downloading YouTube videos. Select MP4 when: You Need Universal Playback MP4 files play on: If you’re downloading YouTube videos to a USB drive for playback on a TV or car stereo, MP4 eliminates compatibility guesswork. The file works. Period. You Plan to Edit the Video Video editing software handles MP4/H.264 files reliably. Adobe Premiere Pro, DaVinci Resolve, Final Cut Pro, and even basic editors like iMovie expect MP4 input. WebM support exists in some editors but often requires transcoding first, which adds time and potential quality loss. You’re Sharing Files with Others Sending a WebM file to someone unfamiliar with video formats creates friction. They might not have a player who handles it. Their phone might refuse to open. MP4 removes this problem entirely; recipients can play the file regardless of their technical knowledge or device choice. You’re Building an Offline Library for Mobile Teachers building offline lesson libraries, students saving lectures, or travelers downloading entertainment for flights should stick with MP4. Mobile devices handle MP4 playback efficiently with minimal battery drain thanks to hardware acceleration. When to Choose WebM WebM makes sense in specific scenarios where its advantages outweigh compatibility trade-offs: You Want the Highest Available Quality YouTube serves its best streams, 4K, 8K, and HDR content, primarily in WebM format using VP9 or AV1 codecs. If you request MP4/H.264 for a 4K video, you might receive a downgraded 1080p version or a file that was transcoded from the WebM original (introducing quality loss). For maximum visual fidelity on high-resolution content, WebM delivers what YouTube actually stores on its servers. Storage Space Matters VP9 achieves comparable visual quality to H.264 at significantly smaller file sizes. AV1 pushes efficiency even further. If you’re archiving hundreds of videos, WebM saves substantial storage: Resolution MP4 (H.264) Estimate WebM (VP9) Estimate Space Saved 1080p, 10 min 200-300 MB 120-180 MB ~40% 4K, 10 min 800-1200 MB 500-700 MB ~40% Over 100 videos, those savings add up to tens of gigabytes. You’re Watching on PC, Android, or Browser If your content stays on a Windows PC, Android phone, or streams through Chrome/Firefox/Edge, WebM plays perfectly. Modern Android devices include VP9 hardware decoding, making playback smooth and battery-efficient. You Support Open Standards WebM and its codecs (VP9, AV1, Opus) are royalty-free and open source. Some users prefer supporting non-proprietary formats in principle. How YouTube Actually Delivers Video Understanding YouTube’s delivery system explains why format choice matters. YouTube doesn’t store one video file per upload. Instead, it encodes each video into dozens of versions across different resolutions, codecs, and bitrates. When you watch or download, YouTube’s adaptive streaming system selects appropriate streams based on your device, connection speed, and request. YouTube’s Format Hierarchy  Resolution Tiers: ├── 144p – 720p │   └── Available as: H.264 (MP4) or VP9 (WebM) ├── 1080p │   └── Available as: H.264 (MP4) or VP9 (WebM) ├── 1440p (2K) │   └── Usually: VP9 (WebM) preferred, H.264 limited ├── 2160p (4K) │   └── Usually: VP9 or AV1 (WebM) only └── 4320p (8K) / HDR     └── Typically: VP9 Profile 2 or AV1 (WebM) only At 1080p and below, you can typically choose either format. Above 1080p, WebM dominates because H.264’s file sizes become impractical for YouTube’s bandwidth costs. TubeFetcher’s Approach: MP4 by Default TubeFetcher downloads YouTube videos in MP4 format, prioritizing compatibility over marginal file size savings. This decision reflects how most users actually consume downloaded content: For these use cases, MP4’s universal compatibility matters more than WebM’s efficiency gains. You download a YouTube video, transfer it to your device, and it plays. No conversion. No codec errors. No troubleshooting. TubeFetcher supports quality selection from 144p to 1080p+, letting you balance file size against visual clarity. Check our resolution guide for recommendations based on your playback device. Device Compatibility Matrix Reference this table when deciding which format works for your target device: Device Category MP4 (H.264) WebM (VP9) Notes iPhone / iPad Yes Limited (iOS 14+, Safari only) MP4 recommended Android Phone Yes Yes Either works MacBook Yes Limited (Safari/Chrome) MP4 safer Windows PC Yes Yes (most players) Either works Linux PC Yes (most players) Yes Either works Samsung Smart

AAC vs MP3 for YouTube Audio TubeFetcher Guide
Blog

AAC vs MP3: The Truth About YouTube Audio Quality 

AAC delivers superior audio quality for YouTube rips because YouTube already stores audio in AAC format natively. Extracting to AAC preserves the original stream without conversion loss, while converting to MP3 degrades quality through transcoding, even at 320kbps. Choose AAC (.m4a) for quality and efficiency; use MP3 only when older devices demand universal compatibility. According to audio engineering research, AAC achieves equivalent perceived quality to MP3 at approximately 20-30% lower bitrates. This efficiency gap matters significantly when YouTube’s source audio typically maxes out at 128-192kbps AAC. Understanding this reality prevents the common mistake of assuming “bigger bitrate numbers = better sound.” AAC vs MP3 for YouTube Rips Choose AAC (.m4a) when: Choose MP3 when: For most users in 2026, AAC represents the smarter choice. Here’s why the technical details matter. What Audio Format Does YouTube Actually Use? YouTube doesn’t store audio as MP3. Understanding YouTube’s internal audio architecture explains why format choice matters for quality preservation. YouTube’s Native Audio Codecs YouTube encodes audio streams using two primary codecs: Codec Container Typical Bitrate Usage AAC M4A/MP4 128-256 kbps Standard audio stream Opus WebM 48-160 kbps Efficient alternative stream When you download audio from YouTube, the source material is already AAC or Opus, never MP3. This technical reality creates significant implications for quality. The Transcoding Problem Everyone Misses Here’s the critical insight most articles overlook: YouTube Source (128kbps AAC)     ↓ [Extract to AAC] Your File (128kbps AAC) = IDENTICAL QUALITY  YouTube Source (128kbps AAC)     ↓ [Convert to MP3] Your File (even 320kbps MP3) = QUALITY LOSS  Converting AAC to MP3 means transcoding between two lossy formats. Each lossy compression introduces artefacts. Stacking lossy-to-lossy conversion compounds these artefacts permanently. The “320kbps” label on your MP3 doesn’t recover information already discarded by YouTube’s original compression. According to acoustic analysis studies, transcoding from 128kbps AAC to 320kbps MP3 introduces measurable degradation in high-frequency response and transient clarity, despite the larger file size. AAC vs MP3: Technical Comparison Both AAC (Advanced Audio Coding) and MP3 (MPEG-1 Audio Layer III) use lossy compression, but their efficiency differs substantially. Quality at Equivalent Bitrates Bitrate AAC Quality MP3 Quality Winner 96 kbps Good Poor (artifacts) AAC 128 kbps Very Good Acceptable AAC 192 kbps Excellent Good AAC 256 kbps Transparent Very Good AAC 320 kbps Transparent Excellent Tie Industry rule of thumb: 128kbps AAC ≈ 160-192kbps MP3 in perceived quality. AAC handles complex audio passages, high-frequency content, and sharp transients (drum hits, vocal consonants) more accurately than MP3 at matching bitrates. MP3 tends to produce “muddy” low-end and “crunchy” high-frequency artefacts, particularly below 160kbps. File Size Comparison AAC’s superior compression efficiency translates directly to storage savings: Audio Duration 128kbps AAC 128kbps MP3 192kbps MP3 (equivalent quality) 3-minute song ~2.9 MB ~2.9 MB ~4.3 MB 1-hour podcast ~57 MB ~57 MB ~86 MB 10-hour audiobook ~576 MB ~576 MB ~864 MB At equivalent perceived quality, AAC files run 20-30% smaller than MP3. For large music libraries or limited phone storage, this efficiency compounds significantly. Frequency Response and Artefacts MP3’s compression algorithm aggressively cuts frequencies above 16kHz to reduce file size. This “high-frequency rolloff” removes: AAC preserves these high-frequency details more accurately, maintaining the perceived “clarity” and “openness” of original recordings even at lower bitrates. Device Compatibility Guide Compatibility concerns drive most MP3 preference, but the landscape has shifted dramatically since AAC’s introduction in 1997. AAC Compatibility (2026) Full native support: Potential issues: MP3 Compatibility (Universal) MP3 plays on essentially every audio device manufactured in the past 25 years. If maximum compatibility matters more than quality, particularly for sharing files or using legacy equipment, MP3 remains the safer choice. Quick Compatibility Test Before committing to AAC, test playback on your most restrictive device: If playback fails, an MP3 becomes necessary for that specific device. For most modern setups, AAC works seamlessly. Where Does Opus Fit In? Opus deserves mention as YouTube’s other native codec, offering even better efficiency than AAC. Opus Advantages Opus Limitations Practical recommendation: Use Opus if your entire playback ecosystem supports it. Otherwise, AAC provides the best quality-compatibility balance for YouTube rips. Best Settings for YouTube Audio Downloads Since YouTube’s source quality caps your output quality, choosing appropriate settings prevents wasted file size without a quality benefit. Recommended AAC Settings Use Case Bitrate Reasoning Music listening 128-192 kbps Matches or exceeds YouTube source quality Podcasts/spoken word 96-128 kbps Speech doesn’t need high bitrates Archival/best quality 192-256 kbps Slight overhead for complex passages Important: Selecting 320kbps AAC for YouTube rips wastes storage. YouTube’s source maxes at ~256kbps for premium content, typically 128kbps for standard videos. Higher output bitrates simply pad the file with empty data. If You Must Use MP3 When device compatibility forces MP3 conversion: Setting Recommendation Bitrate 192-256 kbps minimum Stereo mode Joint stereo (better efficiency) Encoder LAME (highest quality MP3 encoder) VBR/CBR VBR V0-V2 or CBR 192+ Avoid 128kbps MP3 for music; the transcoding loss from YouTube’s AAC source becomes audible. Higher bitrates partially compensate for conversion artefacts. How to Extract YouTube Audio Without Quality Loss The extraction method matters as much as format choice. Remuxing (extracting without re-encoding) preserves original quality. Remux vs Re-encode Remuxing (recommended): Re-encoding (avoid when possible): Using TubeFetcher for Audio Extraction TubeFetcher extracts audio efficiently for offline listening: For users who need audio-only files from YouTube content, our guide on downloading YouTube audio as MP3 covers the complete workflow.  Common Misconceptions  Myth 1: “320kbps MP3 is always better than 128kbps AAC” Reality: For YouTube rips, 128kbps AAC often sounds better than 320kbps MP3 because: Myth 2: “M4A and AAC are different formats” Reality: M4A is a container (file wrapper); AAC is the codec (compression method). An .m4a file contains AAC audio, similar to how .mp4 contains video. They’re not competing formats; M4A simply packages AAC audio. Myth 3: “Higher bitrate = higher quality from YouTube” Reality: Output quality cannot exceed source quality. YouTube’s audio typically caps at 128-192kbps AAC. Downloading at 320kbps creates larger files without additional audio information. Myth 4: “MP3 is outdated and sounds terrible” Reality: Modern MP3

YouTube Downloader for students study material
Blog

YouTube Downloader for Students: Save Study Materials

TubeFetcher helps students download YouTube lectures, tutorials, and educational content in MP4 or MP3 format for offline study sessions. This privacy-first desktop app requires no account creation, collects zero personal data, and supports video quality from 144p to 1080p+. Over 100,000 users across 30+ countries already rely on TubeFetcher to build personal study libraries that work without internet access. Streaming educational content during exam prep creates unnecessary stress. Campus Wi-Fi crashes during peak hours. Mobile data runs out mid-lecture. The professor’s recommended video buffers endlessly in the library. Downloaded study materials eliminate these frustrations entirely, giving you reliable access to learning resources anywhere, anytime. Why Students Need Offline Access to YouTube Content YouTube hosts millions of educational videos from Khan Academy, Crash Course, MIT OpenCourseWare, and countless professors who share lectures freely. Streaming this content depends on a stable internet, which students often lack. Unreliable Campus Networks and Data Limits University Wi-Fi struggles when thousands of students connect simultaneously. Lecture halls, dormitories, and libraries all compete for bandwidth. Mobile data plans drain quickly when streaming hour-long lectures. Students in rural areas or developing regions face even greater connectivity challenges. Downloaded videos stored locally on your laptop, tablet, or phone play instantly regardless of network conditions. Distraction-Free Study Environment YouTube’s interface surrounds every video with recommended content, comments, and advertisements. These elements fragment attention during focused study sessions. Downloaded videos remove all distractions. You watch exactly what you need without algorithmic suggestions pulling you toward unrelated content. Protecting Against Content Disappearance Professors delete course videos after semesters end. Channels get terminated. Copyright claims remove content without warning. A lecture you planned to revisit before finals might vanish tomorrow. Offline libraries preserve your curated educational materials permanently. Is It Legal to Download YouTube Videos for Study? Students frequently ask about the legality of downloading educational content. The answer depends on several factors worth understanding. YouTube’s Terms of Service YouTube’s official Terms of Service prohibit downloading content without explicit permission or a provided download button. However, this represents a platform policy, not criminal law. Enforcement typically targets commercial redistribution, not personal educational use. Fair Use Considerations Fair use doctrine permits limited copying of copyrighted material for educational purposes. Four factors determine fair use: purpose (educational favors fair use), nature of the original work, amount used, and market impact. Personal study typically supports fair use claims since you’re not competing commercially with creators. Best Practices for Students Prioritize Creative Commons-licensed content that explicitly permits downloading. Many educational channels like Khan Academy and MIT OpenCourseWare use open licenses. Never redistribute downloaded videos publicly. Keep downloads strictly for personal study. When uncertain, contact the content creator for permission. Best YouTube Downloader Tools for Students  Several tools enable YouTube video downloads. Privacy, safety, and ease of use matter most for students who need reliable study resources without malware risks. Tool Privacy Ease of Use Best For Price TubeFetcher No tracking, local processing One-click, no account All students Free forever 4K Video Downloader Partial data collection Desktop GUI Playlist downloads Freemium yt-dlp Open source, private Command-line only Power users Free Y2Mate/YT1s Privacy concerns, ads Web-based Quick one-off downloads Free ClipGrab Limited tracking Simple interface Basic downloads Free TubeFetcher stands out for students because it requires zero registration, displays no advertisements, and runs entirely on your local device without sending data elsewhere. The portable Windows version works directly from USB drives on library computers without installation privileges. Why Web-Based Downloaders Present Risks Online tools like Y2Mate and SaveFrom display aggressive pop-up advertisements, misleading download buttons, and potential malware. Students using shared or campus computers face particular risks. Desktop applications like TubeFetcher avoid these dangers entirely by processing everything locally. How to Download YouTube Videos with TubeFetcher TubeFetcher reduces video downloading to three simple steps. The entire process takes under 30 seconds. Step 1: Copy the Video URL: Find your lecture or tutorial on YouTube. Copy the URL from your browser’s address bar. The link looks like youtube.com/watch?v=xxxxx. Step 2: Paste into TubeFetcher: Open TubeFetcher on Windows or Android. Paste the copied URL into the input field. The app automatically detects available formats and quality options. Step 3: Choose Quality and Download: Select your preferred resolution. For lectures with slides or code, choose 1080p to read text clearly. For audio-focused content, extract MP3 to save storage space. Click download. Files save to your designated folder within seconds. For downloading multiple videos, simply repeat this process. TubeFetcher’s native architecture processes downloads faster than browser-based alternatives. Choosing the Right Format and Quality Your choice of format and resolution affects both storage requirements and study effectiveness. Video Resolution Guidelines 1080p (Full HD): Essential for lectures featuring slides, code, mathematical equations, or diagrams. Small text becomes unreadable at lower resolutions. A 10-minute 1080p video requires approximately 150-200MB of storage. 720p (HD): Suitable for talking-head lectures without detailed visuals. Reduces file size by roughly 50% compared to 1080p while maintaining acceptable clarity. 480p or Lower: Only consider these for audio-focused content where visuals don’t matter. File sizes shrink dramatically but visual quality suffers. When to Choose MP3 Audio Extract audio-only MP3 files for podcasts, language learning content, or lectures you’ll review while commuting. A one-hour lecture in MP3 format requires only 50-80MB compared to 500MB+ for video. TubeFetcher makes audio extraction simple through format selection.  Learn more in our guide to downloading YouTube audio as MP3. Building Your Offline Study Library Downloading videos represents only the first step. Organized storage transforms scattered files into an effective study system. Folder Structure for Academic Content Create a hierarchical system: Course → Week → Topic. Example: Biology101/Week5/Cell-Division-Lecture.mp4. This structure scales across multiple semesters and makes finding specific content effortless during exam preparation. File Naming Conventions Use descriptive, consistent naming: CourseCode-Topic-Duration-Source.mp4. Example: CHEM201-Organic-Reactions-45min-KhanAcademy.mp4. Standardized naming enables quick searches across hundreds of files. Storage Solutions for Students A 32GB USB drive holds approximately 160-200 videos at 1080p resolution. External hard drives accommodate larger libraries spanning multiple semesters. Cloud storage (Google Drive, Dropbox) enables syncing across devices but requires internet

YouTube Downloader for Teachers
Blog

YouTube Downloader for Teachers: How to Build Offline Lesson Libraries

TubeFetcher enables teachers to download YouTube videos in MP4 or MP3 format for offline classroom use, eliminating buffering interruptions and creating permanent lesson libraries. This privacy-first desktop app requires no account, runs locally on your device, and supports resolutions from 144p to 1080p+. Over 100,000 educators, students, and content creators across 30+ countries already use TubeFetcher to build reliable offline video collections. Unreliable school Wi-Fi disrupts lessons daily. A 2024 EdTech survey found 67% of teachers experienced video buffering during class at least once per week. Offline lesson libraries solve this problem permanently, ensuring every video plays smoothly regardless of network conditions. Why Teachers Need Offline YouTube Access in  Streaming educational videos directly from YouTube creates three critical problems for classroom instruction: network dependency, advertising interruptions, and content availability risks. Overcoming Unreliable School Wi-Fi and Bandwidth Limits School networks often throttle video streaming or fail entirely during peak hours. When 30 students connect simultaneously, bandwidth collapses. Downloaded videos stored locally on your laptop or USB drive play instantly without network dependency. Rural schools and developing regions benefit most, where consistent internet access remains unavailable. Creating Ad-Free, Distraction-Free Learning Environments YouTube displays advertisements before, during, and alongside educational content. These ads break student concentration and sometimes show age-inappropriate material. Downloaded videos contain zero advertisements. Students focus entirely on the lesson content without sidebar recommendations pulling their attention elsewhere. Preserving Educational Content Before It Disappears YouTube creators delete videos regularly. Channels get terminated. Copyright claims remove content without warning. A video you planned to use next semester might vanish tomorrow. Offline libraries preserve your curated educational materials permanently. Your teaching resources remain accessible regardless of platform changes. Is It Legal to Download YouTube Videos for Teaching? Downloading YouTube videos exists in a legal gray area that varies by jurisdiction. Teachers should understand fair use principles and platform terms before building offline libraries. Understanding Fair Use for Educators Fair use doctrine permits limited copying of copyrighted material for educational purposes without permission. Four factors determine fair use: purpose (educational favors fair use), nature of the work, amount used, and market impact. Classroom instruction for non-commercial purposes typically supports fair use claims. However, fair use provides a defense, not a guarantee. Best Practices for Compliance Prioritize Creative Commons-licensed content that explicitly permits downloading and reuse. Never redistribute downloaded videos publicly or upload them elsewhere. Keep downloads for personal classroom use only. Check your institution’s media policies. When uncertain, contact the content creator directly for permission. Best YouTube Downloader Tools for Teachers  Several tools enable YouTube video downloads, each with distinct advantages for educational use. Privacy, ease of installation, and format support matter most for classroom environments. Tool Privacy Ease of Use Price TubeFetcher No tracking, local processing One-click, no account needed Free forever 4K Video Downloader Partial data collection User-friendly GUI Freemium model yt-dlp Open source, fully private Command-line only Free ClipGrab Limited tracking Simple interface Free TubeFetcher stands out for educators because it requires zero account creation, collects no personal data, and offers a portable Windows version that runs without administrator privileges. School IT departments often restrict software installation, but TubeFetcher’s portable edition works directly from a USB drive. How to Download YouTube Videos with TubeFetcher (Step-by-Step) TubeFetcher simplifies video downloading to three actions. The entire process takes under 30 seconds per video. Step 1: Copy the YouTube Video URL:Navigate to the educational video on YouTube. Copy the URL from your browser’s address bar. The link format looks like youtube.com/watch?v=xxxxx. Step 2: Paste into TubeFetcher:Open the TubeFetcher app on Windows or Android. Paste the copied URL into the input field. TubeFetcher automatically detects available formats and resolutions. Step 3: Select Quality and Download:Choose your preferred resolution (720p or 1080p works best for classroom projectors). Select MP4 for video or MP3 for audio-only content. Click download. Files are saved to your chosen folder within seconds. For batch downloading multiple videos, repeat this process for each URL. TubeFetcher processes downloads quickly due to its native architecture, outperforming browser-based alternatives. How to Organize Your Offline Lesson Library A well-organized video library saves preparation time and prevents frustration when searching for specific content during class. Folder Structure by Subject and Grade Level Create a hierarchical folder system: Subject → Grade → Unit → Lesson. Example: Science/Grade8/Cells/Mitosis-Explained.mp4. This structure scales whether you teach one subject or multiple grades. File Naming Conventions Use descriptive filenames: Topic-Duration-Source.mp4. Example: Photosynthesis-Process-8min-CrashCourse.mp4. Consistent naming enables quick searches across hundreds of files. Adding Subtitles for Accessibility Many tools download subtitle files (.srt) alongside videos. Place the subtitle file in the same folder with an identical filename. VLC and most media players automatically detect and display captions. This supports ESL students, hearing-impaired learners, and students who process information better with text reinforcement.  Learn more in our guide to downloading YouTube videos with subtitles. Technical Requirements for Classroom Playback Resolution and format choices affect both storage space and display quality. Resolution: 1080p offers excellent quality for most classroom projectors and interactive whiteboards. 720p reduces file size by approximately 50% while maintaining acceptable clarity. 4K wastes storage space since most school projectors cannot display beyond 1080p. Format: MP4 (H.264 codec) plays on virtually every device, including Chromebooks, iPads, Windows laptops, and Android tablets. Avoid proprietary formats that require specific software. Storage: A 10-minute 1080p video requires approximately 150-200MB. A 32GB USB drive holds roughly 160-200 videos. External hard drives or school server storage accommodate larger libraries.  See our guide on downloading YouTube videos to USB drives for detailed storage strategies. Start Building Your Offline Lesson Library Today TubeFetcher eliminates the frustration of buffering videos and network failures during classroom instruction. Download educational content once, use it reliably forever. The app runs locally on your device, collects no personal information, and costs nothing. Download TubeFetcher and save your first educational video in under 30 seconds. Available for Windows and Android, with macOS coming soon. Frequently Asked Questions Is it legal to download YouTube videos for teaching? Educational fair use may permit downloading for non-commercial classroom instruction. However,

Scroll to Top